Django framework
C:\Users\user_name>pip install virtualenvwrapper-winC:\Users\user_name>mkvirtualenv my_djOR
To create virtual environment. Move to the directory you want to create ( here it is smo_dj3)
C:\Users\user_name>cd smo_dj3
C:\Users\user_name\smo_dj3\>python -m venv my_djTo activate the virtual environment. ( these files are created in above command )
C:\Users\user_name\smo_dj3>my_dj\Scripts\activate.batIf you have not installed Django then use this command
(my_dj) C:\Users\user_name>pip install django(my_dj) C:\Users\user_name>cd smo_dj(my_dj) C:\Users\user_name\smo_dj>django-admin --version(my_dj) C:\Users\user_name\smo_dj>python manage.py versionUsing help
python manage.py helpCreating a project
(my_dj) C:\Users\user_name\django admin startproject my_projStarting web server.
Change to our project directory(my_dj) C:\Users\user_name\cd my_proj(my_dj) C:\Users\user_name\my_proj>python manage.py runserverhttp://127.0.0.1:8000/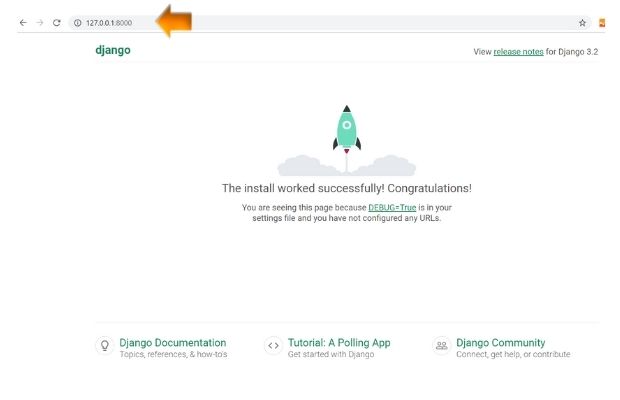
Check system python manage.py check Check system
To start any app we will use this command
python manage.py startapp my_appUsing templates
Templates for adding content, let us create a directory smo_temp and we will set this inside settings.py file like this.go to TEMPLATES
'DIRS': [os.path.join(BASE_DIR,'smo_temp')],TEMPLATES = [
{
'BACKEND': 'django.template.backends.django.DjangoTemplates',
'DIRS': [os.path.join(BASE_DIR,'smo_temp')],
'APP_DIRS': True,
'OPTIONS': {
'context_processors': [
'django.template.context_processors.debug',
'django.template.context_processors.request',
'django.contrib.auth.context_processors.auth',
'django.contrib.messages.context_processors.messages',
],
},
},
]Welcome to plus2net.comviews.py
Inside my my_dir/views.py we can keep this codefrom django.shortcuts import render
from django.http import HttpResponse
# Create your views here.
def index(request):
return render(request,'home.html')Publishing dynamic content
We can use our home.html file to publish dynamic content. Change the code inside home.html to this.Welcome to {{site}} to learn Python,<br>
this is inside smo_temp, home.html filefrom django.shortcuts import render
# Create your views here.
from django.http import HttpResponse
def index(request):
return render(request,'home.html',{'site':'plus2net'})django template language ( DTL )
We will create one template file temp_basic.html like this<html>
<head>
<title>This is basic template file </title>
</head>
<body>
{% block content %}
{% endblock %}
<br><br>
<center>Displayed by using template file temp_basic.html</center>
</body>
</html>{% extends 'temp_basic.html' %}
{% block content %}
Welcome to  {{site}} to learn Python,<br>
 this is inside smo_temp, home.html file
{% endblock %}Welcome to plus2net to learn Python,
this is inside smo_temp, home.html file
Displayed by using template file temp_basic.html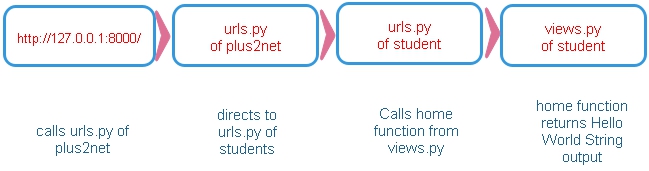
( One more Example )Creating Project
Navigate to the directory where we want to store our Project, let us give the name of the project as my_proj. I want to keep this project inside my D:\testing\ folder. My path should be like this. Note the virtual environment my_dj.(my_dj) D:\testing>(my_dj) D:\testing>django-admin startproject my_proj(my_dj) D:\testing\my_proj\manage.py
\my_proj\__init__.py
\asgi.py
\settings.py
\urls.py
\wsgi.pymy_proj The root or outer directory of the project. manage.py Command line utility to interact with Django Project
my_proj/__init__.py : An empty file my_proj/settings.py : configuration of the projectmy_proj/urls.py : Table of contents of sites my_proj/asgi.py : for ASGI compatible web serversmysite/wsgi.py : for WSGI compatible web servers(my_dj) D:\testing\my_proj>python manage.py runserverWatching for file changes with StatReloader
Performing system checks...
System check identified no issues (0 silenced).
You have 18 unapplied migration(s). Your project may not work properly until you apply the migrations for app(s): admin, auth, contenttypes, sessions.
Run 'python manage.py migrate' to apply them.
January 06, 2022 - 15:20:35
Django version 4.0.1, using settings 'my_proj.settings'
Starting development server at http://127.0.0.1:8000/
Quit the server with CTRL-BREAK.Creating my_app application
To create one application ( my_app ), we will move to directory where our manage.py file is available.(my_dj) D:\testing\my_proj>python manage.py startapp my_app(my_dj) D:\testing\my_proj\manage.py
\my_proj\__init__.py
\asgi.py
\settings.py
\urls.py
\wsgi.py
\my_app\migrations\__init__.py
\__init__.py
\admin.py
\apps.py
\models.py
\tests.py
\views.pyCreating view inside my_app
Inside my_app\views.py write this code. This is the simple text we will display as our first project.from django.http import HttpResponse
from django.shortcuts import render
# Create your views here.
def index(request):
return HttpResponse(" hello welcome to my_project")from django.urls import path
from . import views
# Create your views here.
urlpatterns=[
path('',views.index,name='index'),
]from django.contrib import admin
from django.urls import include,path
urlpatterns = [
path('my_app/', include('my_app.urls')),
path('admin/', admin.site.urls),
](my_dj) D:\testing\my_proj>python manage.py runserverhttp://127.0.0.1:8000/my_app/hello welcome to my_project
Subhendu Mohapatra
Author
🎥 Join me live on YouTubePassionate about coding and teaching, I publish practical tutorials on PHP, Python, JavaScript, SQL, and web development. My goal is to make learning simple, engaging, and project‑oriented with real examples and source code.
Subscribe to our YouTube Channel here
This article is written by plus2net.com team.
https://www.plus2net.com

 Python Video Tutorials