Python tkinter Label
Show Table of Content
- Font style & Colour
- Background colour
- Overstrike font
- Font Alignment
- Entry box & Label
- Updating text
- Duration of text on a Label
- Randomly displaying text from a list with a time delay
- Delete Label
- relief option
- Labels in Grid
- Changing the font colour dynamically
- Adding Image
- Adding Bitmap
- Enable Disable Label
- Click Event
- Chess Board
- Hyper Link
- Using Button as Hyperlink
- Passing parameters through link
- Creating Dynamic Row-Wise Tkinter Labels from Data Sources
This code we will add one label.
import tkinter as tk
my_w=tk.Tk()
my_w.geometry('300x100')
my_w.title('www.plus2net.com')

l3 = tk.Label(my_w,  text='Welcome', width=15 )
l3.grid(row=1,column=1)
my_w.mainloop()
Tkinter Label with font styles color & background using fg bg text & relief with borderwidth
Adding font style and font color. ↑
We will add one tuple with font style using font option and add text color by using fg option. Change these lines.my_font1=('times', 18, 'bold') # font style declaring
l3 = tk.Label(my_w, text='Welcome', width=15,font=my_font1,fg='red' )
Adding background color ↑
add bg='yellow' to add background color to the Labell3 = tk.Label(my_w, text='Welcome', width=15,font=my_font1,
fg='red',bg='yellow' ) 
To change or manage the text of a label we can use StringVar(), by changing the value of the StringVar, we can update the text on the Label.
import tkinter  as tk
my_w = tk.Tk()
my_w.geometry("500x500")

my_str = tk.StringVar()
l1 = tk.Label(my_w,  textvariable=my_str, width=10 )
l1.grid(row=1,column=2)
my_str.set("Hi Welcome")

my_w.mainloop()overstrike font ↑
import tkinter as tk
my_w=tk.Tk()
my_w.geometry('300x100')
my_w.title('www.plus2net.com')

f1=("Times", 22, 'overstrike')
l3 = tk.Label(my_w,fg='green',text='strikethrough text word',font=f1)
l3.grid(row=1,column=1,padx=2)
my_w.mainloop()f1=("Times", 22, ('overstrike','italic','bold'))Alignment of text in Label ↑
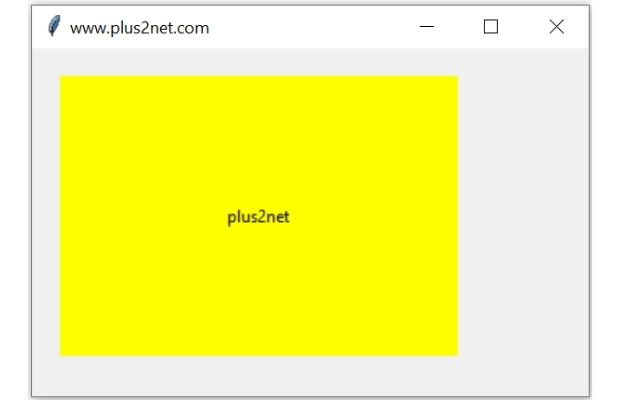
We can use anchor attribute to align the text within a Label. Here we have given fixed width and height by using height=13 and width =40 and background colour='yellow' to give more space for different alignments using anchor option.
Default value for anchor is 'center'.
Other values for anchor are
n, ne, e, se, s, sw, w, nw, or center. These values are based on four direction North , South, East and West.
import tkinter as tk
from tkinter import ttk
my_w = tk.Tk()
my_w.geometry("400x250")  # Size of the window
my_w.title("www.plus2net.com")  #  title
l1=tk.Label(my_w,text='plus2net',bg='yellow',
    height=13,width=40,anchor='center')
l1.grid(row=0,column=0,padx=20,pady=20)

my_w.mainloop()  # Keep the window open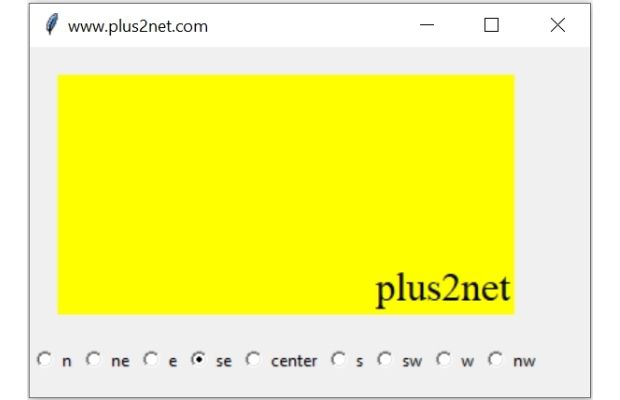
We can align text in all 9 directions by using 9 radioButtons. Here we are updating the anchor attribute by using config() method.
import tkinter as tk
from tkinter import ttk
my_w = tk.Tk()
my_w.geometry("400x250")  # Size of the window
my_w.title("www.plus2net.com")  #  title
font1=('Times',22,'normal')
l1=tk.Label(my_w,text='plus2net',bg='yellow',font=font1,
    height=5,width=20,anchor='center')
l1.grid(row=0,column=0,columnspan=9,padx=20,pady=20)
r1_v = tk.StringVar()  # string variable
r1_v.set('center')     # Can assign value Appear or Failed
def my_upd():
    l1.config(anchor=r1_v.get())

r1 = tk.Radiobutton(my_w, text='n', variable=r1_v, value='n',command=my_upd)
r1.grid(row=1,column=0)
r2 = tk.Radiobutton(my_w, text='ne', variable=r1_v, value='ne',command=my_upd)
r2.grid(row=1,column=1)
r3 = tk.Radiobutton(my_w, text='e', variable=r1_v, value='e',command=my_upd)
r3.grid(row=1,column=2)
r4 = tk.Radiobutton(my_w, text='se', variable=r1_v, value='se',command=my_upd)
r4.grid(row=1,column=3)
r5 = tk.Radiobutton(my_w, text='center', variable=r1_v, value='center',command=my_upd)
r5.grid(row=1,column=4)
r6 = tk.Radiobutton(my_w, text='s', variable=r1_v, value='s',command=my_upd)
r6.grid(row=1,column=5)
r7 = tk.Radiobutton(my_w, text='sw', variable=r1_v, value='sw',command=my_upd)
r7.grid(row=1,column=6)
r8 = tk.Radiobutton(my_w, text='w', variable=r1_v, value='w',command=my_upd)
r8.grid(row=1,column=7)
r9 = tk.Radiobutton(my_w, text='nw', variable=r1_v, value='nw',command=my_upd)
r9.grid(row=1,column=8)

my_w.mainloop()  # Keep the window open
Tkinter alignment of text in directions in a Label using anchor attributes by using radio buttons
For multiline Label we can use justify. Here we can use values as left | right | center ( default )
lb1 = tk.Label(my_w,  text='Welcome \n 2nd line \n third', height=4,
               anchor='w',justify='left',width=60,bg='lightgreen' )
lb1.grid(row=2,column=1,padx=10,columnspan=3,sticky='w')
Entry box and Label ↑
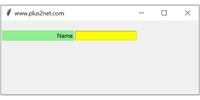 For any entry widget we can use Label to indicate the type of data required. Here is one with
 anchor='e' to align the Label text close to the Entry widget.
l1=tk.Label(my_w,text='plus2net',bg='lightgreen',
    width=20,anchor="e")
l1.grid(row=0,column=0,padx=2,pady=20)
e1 = tk.Entry(my_w,width=20,bg='yellow')
e1.grid(row=0,column=1)
Updating text of Label using user input ↑
We will use one Entry widget to take the user input and update the text of the Label using the user entered data. Here we are connecting both the widgets to a common StringVar by using textvariable option.import tkinter as tk
my_w = tk.Tk()
my_w.geometry("400x250") # Size of the window
my_w.title("www.plus2net.com") # title
font1=('Times',22,'normal') # font style and size
str1=tk.StringVar(value='plus2net') # common string Variable
l1=tk.Label(my_w,bg='lightgreen',textvariable=str1,width=10,font=font1)
l1.grid(row=0,column=0,padx=5,pady=20)
e1 = tk.Entry(my_w,width=10,bg='yellow',font=font1,textvariable=str1)
e1.grid(row=0,column=1)
my_w.mainloop() # Keep the window openUpdating text of Label after a time duration ↑
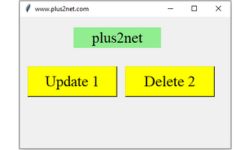
Each button on click calls the function my_upd() with a message as parameter.
Inside the function my_upd() after displaying the message, by using after() we are restoring to original message after a time delay of 3000 milliseconds.
https://youtube.com/shorts/6ti88YPDBnQ
import tkinter as tk
my_w = tk.Tk()
my_w.geometry("400x250")  # Size of the window
my_w.title("www.plus2net.com")  #  title
font1=('Times',22,'normal') # font style and size
str1=tk.StringVar(value='plus2net') # common string Variable

lb1=tk.Label(my_w,bg='lightgreen',textvariable=str1,width=10,font=font1)
lb1.grid(row=0,column=0,padx=5,pady=20,columnspan=2)

def my_upd(my_msg):
    lb1['bg']='lightyellow'
    str1.set(my_msg) # update to new message
    lb1.after(3000,lambda:str1.set('plus2net'))
    lb1.after(3000,lambda:lb1.config(bg='lightgreen'))

bt1 = tk.Button(my_w,width=10,bg='yellow',
    font=font1,text='Update 1',command=lambda:my_upd('Data updated'))
bt1.grid(row=1,column=0,padx=15,pady=15)

bt2 = tk.Button(my_w,width=10,bg='yellow',
    font=font1,text='Delete 2',command=lambda:my_upd('Data deleted'))
bt2.grid(row=1,column=1)
my_w.mainloop()  # Keep the window open
Randomly displaying text from a list with a time delay ↑
import tkinter as tk
import random
my_w = tk.Tk()

my_w.geometry("300x200")  # Size of the window
my_w.title("www.plus2net.com")  # Adding a title

my_list=['Alex','Ron','Ravi','Geek','Rbindra']

lb1=tk.Label(my_w,text='plus2net',width=15,bg='yellow',font=22)
lb1.grid(row=0,column=0,padx=30,pady=50)

def my_fun():
    random_element = random.choice(my_list) # random selection
    lb1.config(text=random_element) # update the text
    my_w.after(1000, my_fun) # call the function after a delay
my_fun()
my_w.mainloop()  # Keep the window open
Deleting Label ↑
We can delete ( permanently ) a Label from Tkiner window by using destroy(). Here we have used one button and onClick event of the button the Label is deleted.b1 = tk.Button(my_w,text='Delete',command=lambda:l1.destroy())
b1.grid(row=0,column=0,padx=10,pady=10)
l1=tk.Label(my_w,bg='lightgreen',text='Welcome')
l1.grid(row=1,column=0,padx=5,pady=10)pack_forget() : for Pack layout
Using relief option ↑
Option relief can take raised, sunken, ridge, solid,flat, grooveimport tkinter as tk
my_w=tk.Tk()
my_w.geometry('320x120')
my_w.title('www.plus2net.com')
my_font1=('times', 14) # font style declaring
l0 = tk.Label(my_w, text='relief', width=10)
l0.grid(row=1,column=2)
l1 = tk.Label(my_w, text='raised', width=10,font=my_font1,
fg='red',borderwidth=2, relief='raised' )
l1.grid(row=2,column=2)
l2 = tk.Label(my_w, text='sunken', width=10,font=my_font1,
fg='red',borderwidth=2, relief='sunken' )
l2.grid(row=2,column=3)
l3 = tk.Label(my_w, text='ridge', width=10,font=my_font1,
fg='red',borderwidth=2, relief='ridge' )
l3.grid(row=3,column=2)
l4 = tk.Label(my_w, text='solid', width=10,font=my_font1,
fg='red',borderwidth=2, relief='solid' )
l4.grid(row=3,column=3)
l5 = tk.Label(my_w, text='groove', width=10,font=my_font1,
fg='red',borderwidth=2, relief='groove' )
l5.grid(row=4,column=2)
l6 = tk.Label(my_w, text='flat', width=10,font=my_font1,
fg='red',borderwidth=2, relief='flat' )
l6.grid(row=4,column=3)
my_w.mainloop()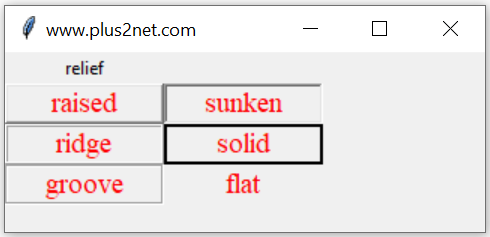
Positioning Labels using GRID ↑
To manage layout read more on grid()
We will change the font size, font colour, font family and place them at different locations using GRID row and column layouts.
import tkinter  as tk
my_w = tk.Tk()
my_w.geometry("300x200")

my_font1=('times', 18, 'bold')
my_str1 = tk.StringVar()
l1 = tk.Label(my_w,  textvariable=my_str1, fg='red',font=my_font1 )
l1.grid(row=1,column=2,columnspan=3,sticky='E')
my_str1.set("plus2net.com")

my_font2=('Verdana', 10, 'normal')
my_str2 = tk.StringVar()
l2 = tk.Label(my_w,  textvariable=my_str2, fg='black',font=my_font2 )
l2.grid(row=2,column=1)
my_str2.set("python tutorials")

my_font3=('MS Sans Serif', 10, 'italic')
my_str3 = tk.StringVar()
l3 = tk.Label(my_w,  textvariable=my_str3, fg='green',font=my_font3 )
l3.grid(row=3,column=3)
my_str3.set("Tkinter")

my_str4 = tk.StringVar()
l4 = tk.Label(my_w,  textvariable=my_str4, font=my_font2 )
l4.config(fg='blue')
l4.grid(row=4,column=4)
my_str4.set("Pandas")


my_str5 = tk.StringVar()
l5 = tk.Label(my_w,  textvariable=my_str5, fg='yellow',font=my_font2 )
l5.grid(row=5,column=5)
my_str5.set("Numpy")

my_w.mainloop()
Tkinter Label managing text by StringVar to update using user input by using get() & set() methods
Now let us add the click event of a button, to change the text of the label.
# Change the text of a label
import tkinter  as tk
my_w = tk.Tk()
my_w.geometry("500x500")

def my_upd():
     my_str.set("plus2net.com")

my_str = tk.StringVar()
l1 = tk.Label(my_w,  textvariable=my_str, width=10 )
l1.grid(row=1,column=2)
my_str.set("Hi Welcome")

b1 = tk.Button(my_w, text='Change text', width=15,bg='yellow',command=lambda: my_upd())
b1.grid(row=2,column=2)

my_w.mainloop()import tkinter as tk
my_w = tk.Tk()
my_w.geometry("500x500")
def my_upd():
my_str.set("plus2net.com") # set string for button 1
my_copy_text=l1.cget('text')
my_str2.set(my_copy_text) # read text from button 1 and set text to button 2
#my_str = tk.StringVar()
l1 = tk.Label(my_w, text='Hi Welcome', width=10 )
l1.grid(row=1,column=2)
#my_str.set("Hi Welcome")
my_str2 = tk.StringVar()
l2 = tk.Label(my_w, textvariable=my_str2, width=10 )
l2.grid(row=1,column=3)
my_str2.set("I will change")
b1 = tk.Button(my_w, text='Change text', width=15,bg='yellow',command=lambda: my_upd())
b1.grid(row=2,column=2)
my_w.mainloop()Changing the font colour dynamically ↑
Based on condition or event we can change the color of the font.l1.config(fg='green') # foreground colorl1.config(bg='yellow') # background colorAdding Image ↑
import tkinter  as tk
my_w = tk.Tk()
my_w.geometry("400x200")

l1 = tk.Label(my_w,  width=15 )
l1.grid(row=1,column=1)

my_img = tk.PhotoImage(file = "top2.png") # place image in same folder as your script
l2 = tk.Label(my_w,  image=my_img )
l2.grid(row=1,column=2)

my_w.mainloop()
Adding Bitmap ↑
A bitmap is a built-in monochrome icon that Tkinter can display on a Label without needing an external image file. Use thebitmap option to show one.
import tkinter  as tk
my_w = tk.Tk()
my_w.geometry("250x200")

l1 = tk.Label(my_w,  width=15 )
l1.grid(row=1,column=1,pady=20)

l2 = tk.Label(my_w,  bitmap='question' )
l2.grid(row=1,column=2)

my_w.mainloop()More on Tkinter Bitmap
Enable disable Label ↑
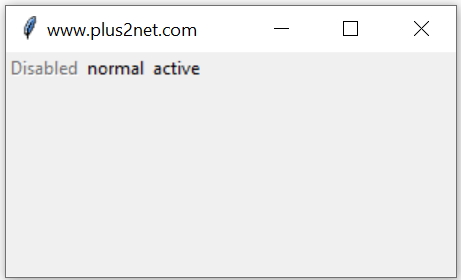
The state option can have three values : disabled, normal , active.
l1 = tk.Label(my_w, text='Disabled',state='disabled')
l1.grid(row=1,column=1)
l2 = tk.Label(my_w, text='normal',state='normal')
l2.grid(row=1,column=2)
l3 = tk.Label(my_w, text='active',state='active')
l3.grid(row=1,column=3)l1.config(state='normal')With active state appearance can be changed to add mouse over effects like sunken ,raised etc..
Click event of Label ↑
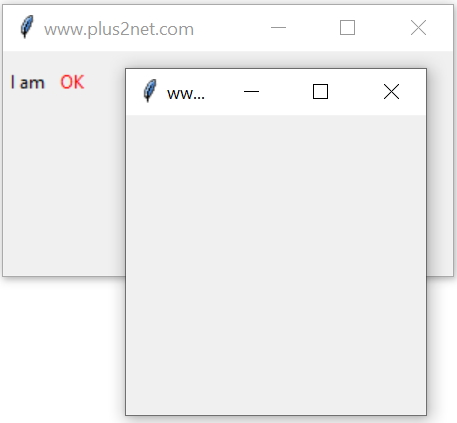
Tkinter bind click event of a Label to open Toplevel child window on bind
There is no command option for label. We can use bind option to trigger function on click of a Label. Here one child window is opened on click of the Label saying OK.
import tkinter as tk
from tkinter import *

my_w = tk.Tk()
my_w.geometry("300x150")  # Size of the window
my_w.title("www.plus2net.com")  # Adding a title
def my_fun(*args):
    my_w_child=Toplevel(my_w) # Child window
    my_w_child.geometry("200x200")  # Size of the window

l1=tk.Label(my_w,text='I am')
l1.grid(row=0,column=0,padx=2,pady=10)
l2=tk.Label(my_w,text='OK',fg='red')
l2.grid(row=0,column=1,padx=2,pady=10)
l2.bind("<Button-1>",my_fun) # mouse click
my_w.mainloop()  # Keep the window open
Creating Chess board using Label ↑

import tkinter  as tk
my_w = tk.Tk()
my_w.geometry("620x590")
bg='#ffffff'
l0=tk.Label(my_w,text='  ')
l0.grid(row=0,column=0)
height=4
width=10 # change this to match your display
for i in range (1,9):
    if bg=='#ffffff':
        bg='#000000'
    else:
        bg='#ffffff'
    for j in range(1,9):
        if bg=='#ffffff':
            bg='#000000'
        else:
            bg='#ffffff'
        l1=tk.Label(my_w,bg=bg,height=height,width=width,
                borderwidth=1,relief='groove')
        l1.grid(row=i,column=j)
my_w.mainloop()
How to add Hyperlink in Tkinter window ↑
Adding hyperlink to a Tkinter window to open web browser in local computer using webbrowser library
We will use one label to place hyper link or URL ( address of a web page ) on a Tkinter window.
Here we have connected mouse left button click event ( <Button-1> ) to the webbrowser.open_new() method.
import webbrowser
import tkinter as tk

my_w = tk.Tk()
my_w.geometry("400x200")

my_link = tk.Label(my_w, text="plus2net  Hyperlink",
    fg="blue", cursor="hand2",font=['Times',22,'underline'])
my_link.grid(row=0,column=0,padx=20,pady=20)
my_link.bind("<Button-1>",
    lambda e: webbrowser.open_new("https://www.plus2net.com"))

my_w.mainloop()
Using Button as Hyperlink ↑
import webbrowser
import tkinter as tk

my_w = tk.Tk()
my_w.geometry("400x200")
def my_open():
    url = "https://www.plus2net.com"
    webbrowser.open_new(url)

my_button = tk.Button(my_w,text="plus2net", fg="blue",
                      cursor="hand2",font=18,command=my_open)
my_button.grid(row=1, column=1,padx=20, pady=20)
my_w.mainloop()Passing parameters through link ↑
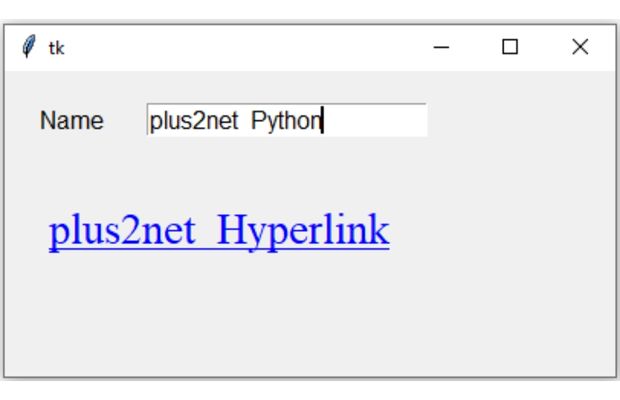
We will create the URL by asking user to enter name in one Entry box. On click of the link the site and particular page will open and it will display the welcome message by using the entered name.
Using user input data of Tkinter to Pass to URL and opening web page by webbrowser
import webbrowser
import tkinter as tk

my_w = tk.Tk()
my_w.geometry("400x200")
l1=tk.Label(my_w,text='Name',font=22)
l1.grid(row=0,column=0,padx=20,pady=20)
e1 = tk.Entry(my_w, font=22)
e1.grid(row=0, column=1, padx=5, pady=20)

my_link = tk.Label(
    my_w,
    text="plus2net  Hyperlink",
    fg="blue",
    cursor="hand2",
    font=["Times", 22, "underline"],
)
my_link.grid(row=1, column=0, columnspan=2,padx=20, pady=20)


def my_open():
    url = "https://www.plus2net.com/php_tutorial/form-get.php?name=" + e1.get()
    webbrowser.open_new(url)

my_link.bind("<Button-1>", lambda e: my_open())

my_w.mainloop()
Creating Dynamic Row-Wise Tkinter Labels from Data Sources ↑
Creating dynamic Tkinter labels in a loop, especially when dealing with multiple labels sourced from a database or various data sources, involves iterating through the data and generating a label for each entry. This process is crucial for displaying data row-wise, where each piece of data gets its own label on the GUI.Dynamic Label
Dynamically create Entry box with Label Text Button Entry
Exercise on Label
- By using four buttons change the Text and Background colour of a Label. On clicking the first button the label should change to Google and background colour should change to Red. Similarly the text and background colour should change on clicking for all other three buttons.

Subhendu Mohapatra
Author
🎥 Join me live on YouTubePassionate about coding and teaching, I publish practical tutorials on PHP, Python, JavaScript, SQL, and web development. My goal is to make learning simple, engaging, and project‑oriented with real examples and source code.
Subscribe to our YouTube Channel here
This article is written by plus2net.com team.
https://www.plus2net.com

 Python Video Tutorials