A Complete Guide to Sliders in Python GUI
Show Table of Content
- Copy value from one scale to other
- Synchronizing Two Scale Widgets
- Synchronizing Multiple Scales Using a Variable
- Inter connecting Spinbox and Scale
- Enable disable scale
- Using radio button to Enable or disable a Scale
- Options
- Dynamic value for from_ and to
- RGB colour sliders
- Dashboard using scale
- Selection of Hour Minute and Seconds
- Creating transparent background window
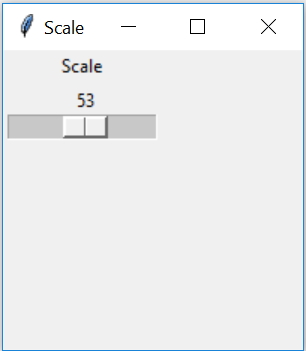
Tkinter Scale to set and get value by moving slider with orient & other options and methods

import tkinter as tk

# Create main parent window
my_w = tk.Tk()
# Set window dimensions (width x height)
my_w.geometry("200x200")
# Set window title
my_w.title("Scale")

# Create a Label widget
l1 = tk.Label(my_w, text="Scale")
l1.grid(row=1, column=1)

# Create a Scale widget (Slider) from 0 to 100
my_scale = tk.Scale(
    my_w,
    from_=0,
    to=100,
    orient='horizontal'
)
my_scale.grid(row=2, column=1, padx=10)

# Run the Tkinter event loop to keep the window open
my_w.mainloop()
Reading value of a scale using get()
value = my_scale.get()  # Get the current value of the Scale
print("Selected Value:", value)  # Display it in the console
my_scale.set(50)
# Set the Scale slider to 50
Copy value from one scale to other by button click 🔝
By using a button click we will assign the value of 2nd scale by reading value of 1st.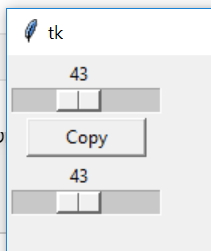
import tkinter as tk
my_w = tk.Tk()
my_w.geometry("500x500")
def my_upd():
my_scale2.set(my_scale1.get()) # read and set value
my_scale1 = tk.Scale(my_w, from_=0, to=100, orient='horizontal')
my_scale1.grid(row=1,column=1)
my_scale2 = tk.Scale(my_w, from_=0, to=100, orient='horizontal')
my_scale2.grid(row=3,column=1)
b1 = tk.Button(my_w, text='Copy', width=10,command=lambda: my_upd())
b1.grid(row=2,column=1)
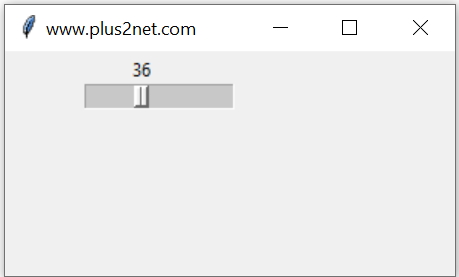
my_w.mainloop()Synchronizing Two Tkinter Scale Widgets without any button click 🔝
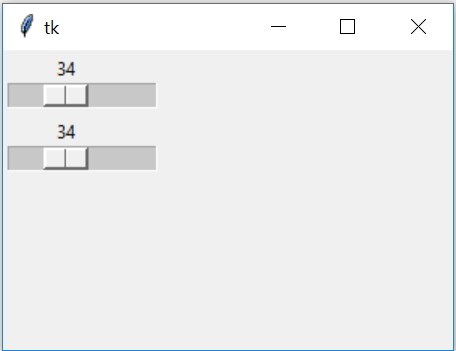
This code demonstrates how to synchronize two **Scale** widgets in Tkinter, ensuring that when the first Scale is adjusted, the second one updates automatically. 🚀
import tkinter as tk
from tkinter import *

# Create main window
my_w = tk.Tk()
my_w.geometry("300x200")

# Function to update Scale2 when Scale1 is moved
def my_upd(value):
    my_scale2.set(my_scale1.get())

# First Scale (Control Scale)
my_scale1 = tk.Scale(
    my_w,
    from_=0,
    to=100,
    orient='horizontal',
    command=my_upd
)
my_scale1.grid(row=1, column=1)

# Second Scale (Mirrors First Scale)
my_scale2 = tk.Scale(
    my_w,
    from_=0,
    to=100,
    orient='horizontal'
)
my_scale2.grid(row=3, column=1)

# Run the Tkinter event loop
my_w.mainloop()
Synchronizing Multiple Scales Using a Single Variable in Tkinter 🔝

This example demonstrates how multiple Scale widgets can be synchronized using a single IntVar variable. Here all widgets are connected by using variable attribute. When one Scale is adjusted, the other updates automatically, ensuring real-time synchronization. 🚀
my_w = tk.Tk()
my_w.geometry("300x200")

# Declare a Tkinter variable with an initial value
my_var = tk.IntVar(value=10)

# First Scale widget (lightgreen background)
my_scale1 = tk.Scale(
    my_w,
    from_=0,
    to=100,
    bg='lightgreen',
    orient='horizontal',
    variable=my_var,
    length=200
)
my_scale1.grid(row=1, column=1, padx=50, pady=20)

# Second Scale widget (antiquewhite background)
my_scale2 = tk.Scale(
    my_w,
    from_=0,
    to=100,
    bg='antiquewhite',
    orient='horizontal',
    variable=my_var,
    length=200
)
my_scale2.grid(row=2, column=1, padx=50, pady=30)

# Run the application
my_w.mainloop()
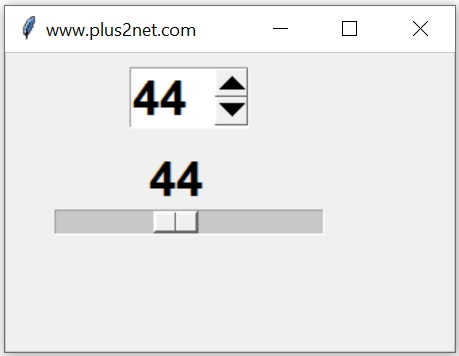
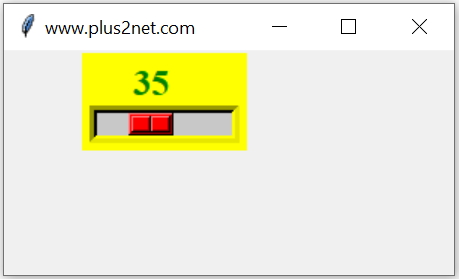
Inter connecting Spinbox and Scale widgets 🔝
We can add one Spinbox widget and link it to a Scale. Here both are connected so changes in any one will reflect in both.We used one common StringVar sv here.
import tkinter as tk

# Create main window
my_w = tk.Tk()
my_w.geometry("300x150")  # Window size
my_w.title("www.plus2net.com")  # Window title

# Define font style
font1 = ['Arial', 28, 'normal']

# Shared Tkinter StringVar for both widgets
sv = tk.StringVar()

# Spinbox Widget (Linked to sv)
sb = tk.Spinbox(
    my_w,
    textvariable=sv,
    width=5,
    from_=0,
    to=100,
    font=font1
)
sb.grid(row=1, column=1, padx=50, pady=10)

# Scale Widget (Also linked to sv)
sc = tk.Scale(
    my_w,
    from_=0,
    to=100,
    orient='horizontal',
    variable=sv,
    font=font1
)
sc.grid(row=2, column=1, padx=20)

# Run the Tkinter event loop
my_w.mainloop()
Enable disable scale 🔝
We can set the option state to active, disabled or normalsv = StringVar() #string variable
sc = Scale(my_w, from_=0, to=100,orient=HORIZONTAL,
state='disabled',variable=sv)
sc.grid(row=2,column=1,padx=50)By using config() we can change the state here.
sc.config(state='normal')Using radio button to Enable or disable a Scale 🔝

import tkinter as tk
my_w = tk.Tk() # Parent window
my_w.geometry("300x150")  # Size of the window
my_w.title("www.plus2net.com")  # Adding a title

font1=['Arial',22,'normal'] # higher size font
r1_v = tk.StringVar(value='normal')  # variable for Radiobutton
def my_upd():
    if r1_v.get()=='normal': # normal redio is clicked
        sc.config(state='normal') # update Scale to normal
    elif r1_v.get()=='disabled':
        sc.config(state='disabled') # Disable  Scale

r1 = tk.Radiobutton(my_w, text='normal', variable=r1_v,
        value='normal',font=font1,command=my_upd)
r1.grid(row=1,column=1)

r2 = tk.Radiobutton(my_w, text='Disabled', variable=r1_v,
        value='disabled',font=font1,command=my_upd)
r2.grid(row=1,column=2)

sc = tk.Scale(my_w, from_=0, to=100,
        orient='horizontal',font=font1)
sc.grid(row=2,column=1,padx=20)

my_w.mainloop()  # Keep the window open
Options 🔝
We can use these options for configuration of Scale.activebackground | Colour of the scale ( handle ) when mouse is over it. |
bg | Background color of the scale area. |
bd | Width of the borders |
command | Function we can use when value is changed. ( see the examples above ) |
cursor | Shape of the cursor when mouse is over it. For a list of available shapes check the end of Button tutorial |
font | Assign font style , size to user entry data ( not the list ). To change the font style of list box use this. |
length | Dimension of the slider, it is x value if orientation is horizontal, otherwise y value of vertical orientation.
|
orient | Orientation of the scale, values can be horizontal or vertical. Default is vertical. See examples above. 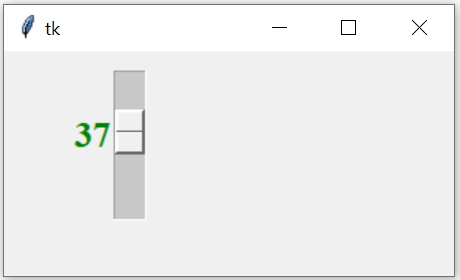 |
relief | Style of the border. Check the button section for more about relief.
It can take these values raised , sunken ,flat, ridge, solid & groove |
resolution | Step value for the slider movement. |
state | normal | active | disabled , options for the state. Check the example above |
sliderlength | The length of the slider
 |
showvalue | Set it to 0 if you don't want the slider value to be displayed. |
takefocus | Set to to 0 if you don't want it to be on focus through tab cycle along with other widgets. |
variable | links the Scale to a Tkinter variable (IntVar or DoubleVar), ensuring automatic updates whenever the variable's value changes. |
width | Default value is 15 pixel, Check the width in different orientation. ( see examples above ) |
Dynamic value for from_ and to 🔝
The range of value we can create by using any source ( database, excel etc ) and accordingly set the data for from_ and to.Here we have used math floored quotient to get these values.
import tkinter as tk
my_w = tk.Tk() # parent window
my_w.geometry("200x200") # width and height of the window
my_w.title("Scale") # title for the window

l1=tk.Label(my_w,text="Scale")
l1.grid(row=1,column=1)
font1=['Arial',22,'normal']

l1=[20,45,55,43,41,59,64,69,70] # data source , update these values

if(min(l1)%10==0):
    my_from=min(l1)
else:
    my_from=(min(l1)//10)*10
if(max(l1)%10 == 0):
    my_to=max(l1)
else:
    my_to=((max(l1)//10)+1)*10
print(my_from,my_to)
sc2=tk.Scale(my_w,from_=my_from,to=my_to,resolution=5,
    length=150,orient='horizontal',font=font1)
sc2.grid(row=2,column=1)
my_w.mainloop() # Keep the window open RGB colour sliders 🔝
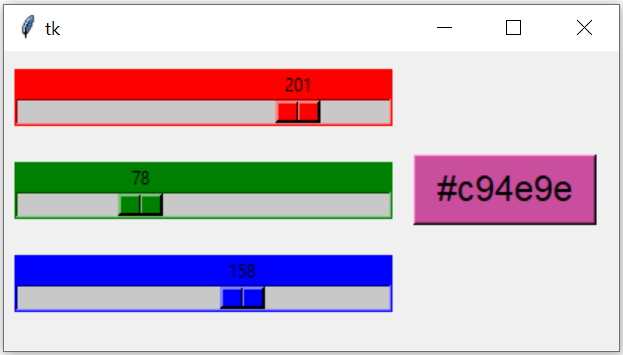
Using colour scales to generate RGB value and update Background of a button.
Dashboard using scale 🔝

Using Scale slider value, pointer movement over Dashboard using Canvas.
Selection of Hour Minute and Seconds using Scale 🔝
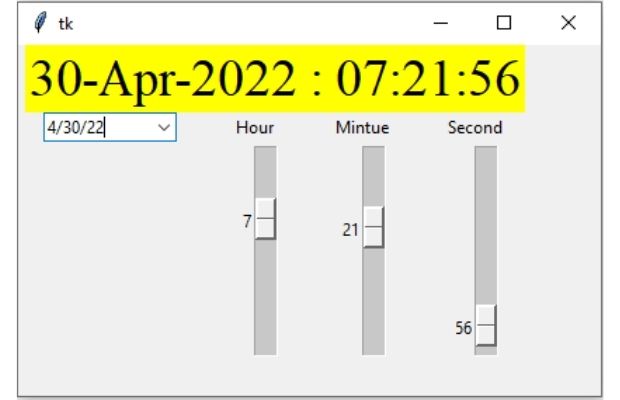
Set Hour Minute and Seconds in a Calendar drop down .
Creating transparent background window 🔝
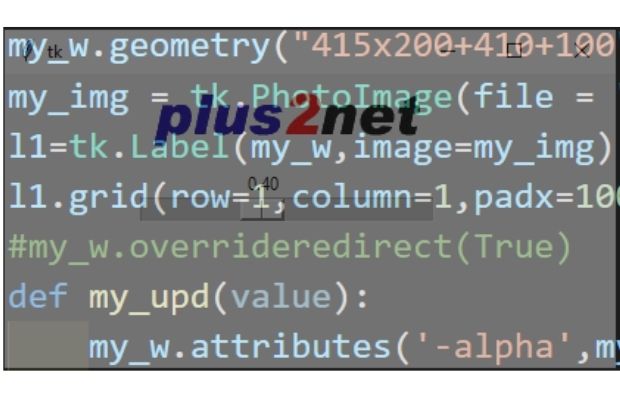
Our scale will set the value of parent window alpha attribute within a range.
my_w.attributes('-alpha',my_scale.get())
Tkinter scale to manage the alpha value of the parent window attribute to make it transparent
import tkinter as tk # Python 3
my_w = tk.Tk()
my_w.geometry("415x200+410+100")
my_img = tk.PhotoImage(file="top2-trans.png")  # update path as needed
l1=tk.Label(my_w,image=my_img)
l1.grid(row=1,column=1,padx=100,pady=10)
#my_w.overrideredirect(True)
def my_upd(value):
    my_w.attributes('-alpha',my_scale.get())

my_scale=tk.Scale(my_w,from_=0.0, to=1.0,resolution=0.05,
     command=my_upd,orient='horizontal', length=200)
my_scale.grid(row=2,column=1)

my_scale.set(1.0)
my_w.bind('<Escape>',lambda e:my_w.quit())
#my_w.bind('<Button-3>',lambda e:my_w.quit()) # mouse right click
my_w.mainloop()
Create one Pandas DataFrame and then using Name column we can prepare one list.
Python Tkinter Projects Linking Progress bar & Scale

Subhendu Mohapatra
Author
🎥 Join me live on YouTubePassionate about coding and teaching, I publish practical tutorials on PHP, Python, JavaScript, SQL, and web development. My goal is to make learning simple, engaging, and project‑oriented with real examples and source code.
Subscribe to our YouTube Channel here
This article is written by plus2net.com team.
https://www.plus2net.com

 Python Video Tutorials