Python Tkinter Listbox — insert, delete, curselection and selectmode Guide

Code is here
import tkinter as tk
my_w = tk.Tk()
my_w.geometry("400x250") # Size of the window
my_w.title("www.plus2net.com") # Window title
font1=['Arial',15,'normal'] # Font type,size and style
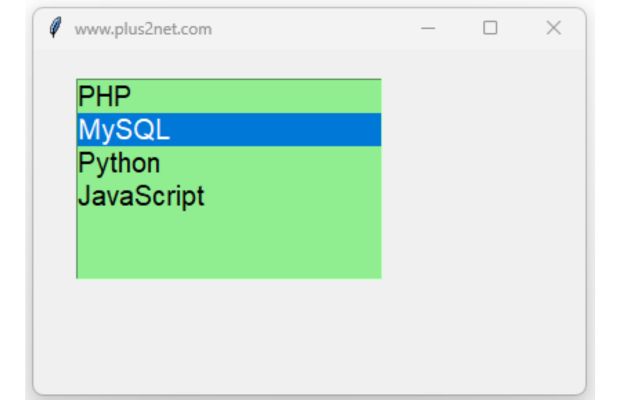
lb1 = tk.Listbox(my_w,height=6,font=font1,bg='lightgreen')
lb1.grid(row=1,column=1,padx=30,pady=20)
lb1.insert(1,'PHP') # Adding element to Listbox
lb1.insert(2,'MySQL')
lb1.insert(3,'Python')
lb1.insert(4,'JavaScript')
my_w.mainloop() # Keep the window open
Tkinter Listbox widget to show options for user selection
Index of Listbox elements starts from 0 .
import tkinter as tk
my_w = tk.Tk()
my_w.geometry("500x500")  # Size of the window

lb1 = tk.Listbox(my_w)
lb1.grid(row=1,column=1)

lb1.insert(1,'PHP')   # Adding one element to Listbox
lb1.insert(2,'Python')
lb1.insert(3,'MySQL')

print(lb1.get(0))  # Output PHP
print(lb1.get(2))  # Output MySQL

my_w.mainloop() # Keep the window openimport tkinter as tk
my_w = tk.Tk()
my_w.geometry("500x300") # Size of the window
lb1 = tk.Listbox(my_w)
lb1.grid(row=1,column=1)
my_list=['PHP','Python','MySQL']
for element in my_list:
lb1.insert(tk.END,element)
print(lb1.get(tk.ACTIVE)) # print the first element only
my_w.mainloop() # Keep the window openimport tkinter as tk
my_w = tk.Tk()
my_w.geometry("500x500") # Size of the window
def my_upd():
print(lb1.get(tk.ACTIVE)) # The selected element
lb1 = tk.Listbox(my_w,height=4)
lb1.grid(row=1,column=1)
my_list=['PHP','Python','MySQL']
for element in my_list:
lb1.insert(tk.END,element)
b1 = tk.Button(my_w, text='Show', width=10,
bg='yellow',command=lambda: my_upd())
b1.grid(row=1,column=2)
my_w.mainloop() # Keep the window openimport tkinter as tk
my_w = tk.Tk()
my_w.geometry("500x500") # Size of the window
def my_upd(my_widget):
my_w = my_widget.widget
index = int(my_w.curselection()[0])
value = my_w.get(index)
print ("You selected item ",index, value)
lb1 = tk.Listbox(my_w,height=4)
lb1.grid(row=1,column=1)
my_list=['PHP','Python','MySQL']
for element in my_list:
lb1.insert(tk.END,element)
lb1.bind('<<ListboxSelect>>', my_upd)
my_w.mainloop() # Keep the window opendef my_upd(my_widget):
selected_indices = lb1.curselection() # index of selected
print(selected_indices) # the tuple with selected index
print(lb1.get(selected_indices)) # value Delete Elements of a Listbox
We can delete selected elements or all elements or by position of the element. You can uncomment the respective line and check how to remove items.import tkinter as tk
my_w = tk.Tk()
my_w.geometry("500x500")
def my_upd():
lb1.delete(tk.ANCHOR) # Delete selected element
#lb1.delete(2) # Remove the 2nd position element
lb1 = tk.Listbox(my_w,height=6)
lb1.grid(row=1,column=1)
my_list=['PHP','Python','MySQL','JavaScript','JQuery']
for element in my_list:
lb1.insert(tk.END,element)
#lb1.delete(0,END) # Delete all elements
b1 = tk.Button(my_w, text="Delete", command=lambda: my_upd())
b1.grid(row=1,column=2)
my_w.mainloop()b1 = tk.Button(my_w, text="Delete", command=lambda lb1=lb1: lb1.delete(tk.ANCHOR))Displaying selected item of Listbox on a Label
Updating Label with Listbox user selected Option Part III
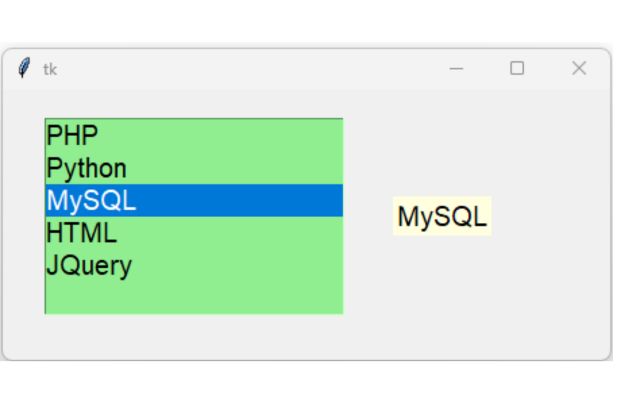
Here we have connected one StringVar() str1 to the Label lb2. Once the user selects any option, the function my_upd() is triggered and the value of the StringVar() str1 is updated by reading the selected element.
import tkinter as tk

my_w = tk.Tk()
my_w.geometry("450x200")  # Size of the window
font1=['Arial',15,'normal'] # Font type,size and style

lb1 = tk.Listbox(my_w,height=6,font=font1,bg='lightgreen')
lb1.grid(row=1,column=1,padx=30,pady=20)

my_list=['PHP','Python','MySQL','HTML','JQuery']
for element in my_list:
    lb1.insert(tk.END,element)

str1=tk.StringVar(value='plus2net') # common string Variable
lb2=tk.Label(my_w,bg='lightyellow',textvariable=str1,font=font1)
lb2.grid(row=1,column=3,padx=5,pady=20)

def my_upd(my_widget): # Triggers on selection of Listbox
    selected_indices = lb1.curselection() #index
    str1.set(lb1.get(selected_indices[0])) # Update StrinvVar()

lb1.bind('<<ListboxSelect>>', my_upd) # binding select event
my_w.mainloop()  # Keep the window open
Multiple selection of options of a Listbox
Displaying Multiple selections of options of a Listbox in a Label Part IV
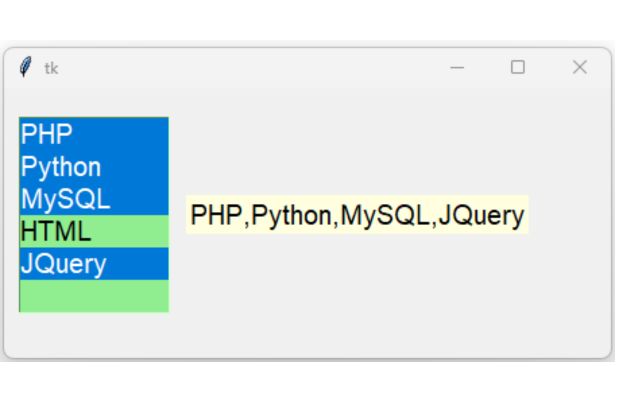
We will modify the above code and add the option
selectmode='multiple' to the Listbox. Inside the function my_upd() our variable selected_indices will hold a list of indices of the selected ( multiple ) options. Using this list we will prepare a string and update the StringVar() str1. import tkinter as tk
my_w = tk.Tk()
my_w.geometry("450x200") # Size of the window
font1=['Arial',15,'normal'] # Font type,size and style
lb1 = tk.Listbox(my_w,height=6,selectmode='multiple',
width=10,font=font1,bg='lightgreen')
lb1.grid(row=1,column=1,padx=10,pady=20)
my_list=['PHP','Python','MySQL','HTML','JQuery']
for element in my_list:
lb1.insert(tk.END,element)
str1=tk.StringVar(value='plus2net') # common string variable
lb2=tk.Label(my_w,bg='lightyellow',textvariable=str1,font=font1)
lb2.grid(row=1,column=2,padx=1,pady=20)
def my_upd(my_widget): # Triggers on selection of Listbox
selected_indices = lb1.curselection() #index
#my_list=map(lambda n:lb1.get(n),selected_indices)
my_list=list() # blank list
for i in selected_indices:
#print(lb1.get(i))
my_list.append(lb1.get(i)) # adding to list
my_str=",".join(map(str,my_list)) # convert to string
str1.set(my_str) # Update stringVar()
lb1.bind('<<ListboxSelect>>', my_upd) # binding select event
my_w.mainloop() # Keep the window openReading elements from Listbox
We can add elements to Listbox by using listvariable option. Using this same variable we can get all the items of the listbox as Tuple.import tkinter as tk
my_w = tk.Tk()
my_w.geometry("500x500") # Size of the window
my_list=['PHP','Python','MySQL']
my_list_v=tk.Variable(value=my_list)
lb1 = tk.Listbox(my_w,listvariable=my_list_v)
lb1.grid(row=1,column=1)
d1=my_list_v.get() # get all the elements of listbox as tuple.
print(d1)# print all elements
my_w.mainloop() # Keep the window open| bg | Background colour of the Listbox |
| bd | Border width of the Listbox |
| cursor | cursor that will appear once the mouse is over the text box
|
| font | Font size style of the button |
| fg | Same as foreground |
| height | Height of the Listbox |

highlightcolor : Border colour when the Listbox is in focus.
|
highlightthickness : Thickness of selected Listbox border |
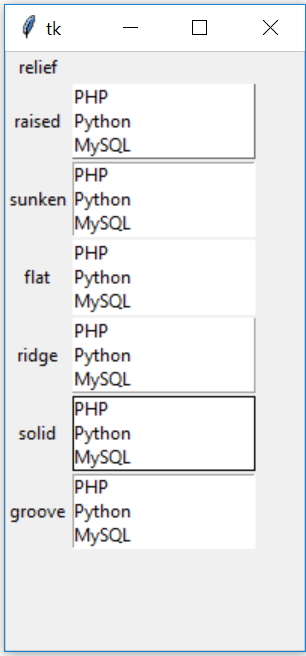
| relief | The Listbox ( borders ) 3 D effect style. It can take these values raised , sunken ,flat, ridge, solid & groove |
#relief
import tkinter as tk
my_w = tk.Tk()
my_w.geometry("200x400")

lb = tk.Label(my_w,  text='relief' )
lb.grid(row=1,column=1)

lbl1 = tk.Label(my_w,  text='raised' )
lbl1.grid(row=2,column=1)
lb1 = tk.Listbox(my_w,height=3,relief='raised')
lb1.grid(row=2,column=2)

lb1.insert(1,'PHP')
lb1.insert(2,'Python')
lb1.insert(3,'MySQL')

lbl2 = tk.Label(my_w,  text='sunken' )
lbl2.grid(row=3,column=1)
l2 = tk.Listbox(my_w,height=3,relief='sunken')
l2.grid(row=3,column=2)

l2.insert(1,'PHP')
l2.insert(2,'Python')
l2.insert(3,'MySQL')

lbl3 = tk.Label(my_w,  text='flat' )
lbl3.grid(row=4,column=1)
l3 = tk.Listbox(my_w,height=3,relief='flat')
l3.grid(row=4,column=2)


l3.insert(1,'PHP')
l3.insert(2,'Python')
l3.insert(3,'MySQL')

lbl4 = tk.Label(my_w,  text='ridge' )
lbl4.grid(row=5,column=1)
l4 = tk.Listbox(my_w,height=3,relief='ridge')
l4.grid(row=5,column=2)

l4.insert(1,'PHP')
l4.insert(2,'Python')
l4.insert(3,'MySQL')

lbl5 = tk.Label(my_w,  text='solid' )
lbl5.grid(row=6,column=1)
l5 = tk.Listbox(my_w,height=3,relief='solid')
l5.grid(row=6,column=2)

l5.insert(1,'PHP')
l5.insert(2,'Python')
l5.insert(3,'MySQL')

lbl6 = tk.Label(my_w,  text='groove' )
lbl6.grid(row=7,column=1)
l6 = tk.Listbox(my_w,height=3,relief='groove')
l6.grid(row=7,column=2)

l6.insert(1,'PHP')
l6.insert(2,'Python')
l6.insert(3,'MySQL')

my_w.mainloop() selectbackground:Background colour once element is selected. |
selectforeground :Foreground (font ) colour once element is selected. |
selectmode: It can be SINGLE, BROWSE, MULTIPLE, EXTENDED
|
| state | values= normal, active or disabled
|
| width | width of the button in Chars |
- Exercise on Listbox
- By using a text box add elements to a Listbox
- Create a button to delete all elements of a Listbox, Another button to delete selected element
- Create a Listbox with 10 items. Create a button to delete 2nd element. Check what happens if multiple time the button is clicked.
- In first column create a Listbox with PHP, MySQL & Python as elements.
In Second column create three checkbuttons for PHP, MySQL & Python
In third column create three radiobuttons for PHP, MySQL & Python.
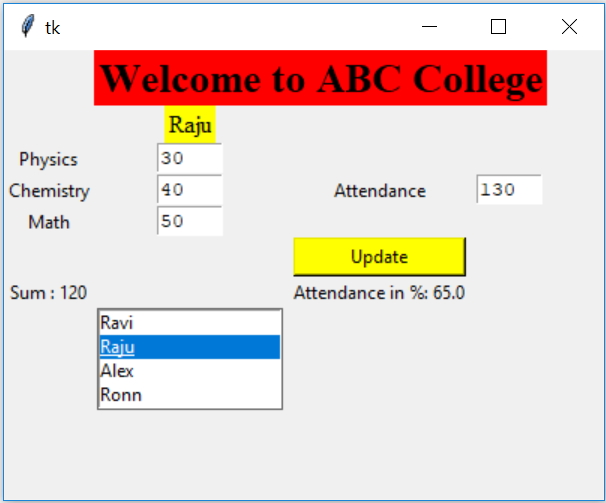
On selection ( click ) of PHP ( or any other option ) in first column (having listbox) , respective checkbox ( PHP ) and radiobutton (PHP) should be selected. - Use the CSV file at the end of the dictionary tutorial. Then read the data and populate one listbox with student names. Then on selection of any student name the respective subject marks with attendance should populate. You should continue with printing of total mark and attendance
Listbox options from Database Table ( as source ) Tkinter Autocomplete using Entry & Listbox.

Subhendu Mohapatra
Author
🎥 Join me live on YouTubePassionate about coding and teaching, I publish practical tutorials on PHP, Python, JavaScript, SQL, and web development. My goal is to make learning simple, engaging, and project‑oriented with real examples and source code.
Subscribe to our YouTube Channel here
This article is written by plus2net.com team.
https://www.plus2net.com

 Python Video Tutorials