Movement of items in Canvas
How to move any item on canvas ?
There are two ways to move the object in a Canvas.Part 1 : Create Delete and Create
The basic concept of moving any item in canvas is to create , delete and then create the same item in new area by changing the coordinates. ( This is discussed here )Part 2 : Using move()
Moving widgets or Images on Canvas by using move()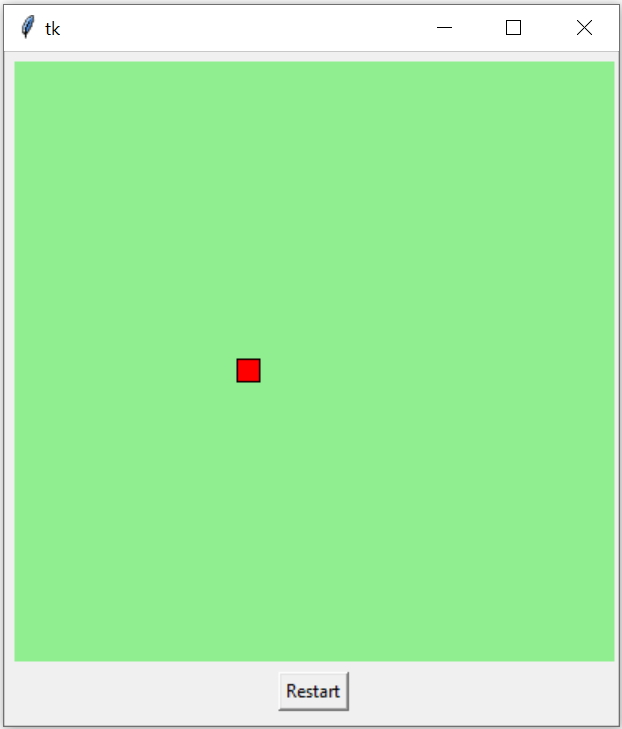
Moving objects in Tkinter Canvas in different directions by using buttons or by timer
Moving a rectangle
For a rectangle we have two coordinates ( x1, y1 ) and (x2, y2) .Moving towards right side
While moving in horizontal direction (right side ) the coordinates for new locations will increase in x direction only. So the new location will be based on this formula. Here step is the variable whose value is the amount of jump or change the item will make.x1=x1+step
x2=x2+stepMoving towards left side
x1=x1-step x2=x2-stepy1=y1-stepy2=y2-stepy1=y1+stepy2=y2+step Making auto movement by using timer
We can repeat the movement by using timer after() , this will call the function after time delay in milliseconds.Here time delay is 100 milliseconds and after the delay the function my_draw() is called.
c1.after(100,my_draw)How long the movement is allowed ?
We don’t want the coordinates to fall beyond the boundaries of the Canvas. So when the coordinates reaches the edge of the boundary and next movement ( based on the step value ) will take the element to outside the canvas, we have to stop there.def my_draw():
global x1,y1,x2,y2,r1
c1.delete(r1) # delete the rectangle
r1=c1.create_rectangle(x1, y1, x2,y2,fill='red')
if (x2<(c_width-step)): # check for right edge x1,x2=x1+step,x2+step # new coordinates of rectangle c1.after(100,my_draw) # recursive call after delay else: return # stop recursive call and return to main import tkinter as tk
my_w = tk.Tk()
width,height=410,210 # set the variables
c_width,c_height=width-10,height-45 # canvas width height
d=str(width)+"x"+str(height)
my_w.geometry(d)
c1 = tk.Canvas(my_w, width=c_width, height=c_height,bg='lightgreen')
c1.grid(row=1,column=0,padx=5,pady=5)
step=5 # value of each incremental movement, change this
x1,y1=5,int(c_height/2) # starting position
x2,y2=x1+15,y1+15 # starting position
r1=c1.create_rectangle(x1, y1, x2,y2,fill='red') # draw rectangle
def my_draw():
    global x1,y1,x2,y2,r1
    c1.delete(r1) # delete the rectangle
    r1=c1.create_rectangle(x1, y1, x2,y2,fill='red')
    if (x2<(c_width-step)): # check for right edge          x1,x2=x1+step,x2+step # new coordinates of rectangle        c1.after(100,my_draw)  # recursive call after delay           else:        return   # stop recursive call and return to main
my_draw() # start moving, remove this if not required at beginning
def restart(): global x1,y1,x2,y2 x1,y1=5,int(c_height/2) # starting position x2,y2=x1+15,y1+15 # starting position my_draw() # start from starting position b1=tk.Button(my_w,text='Restart',command=lambda:restart())b1.grid(row=2,column=0)my_w.mainloop()Using four directional buttons
In above code we have changed ( increased x or horizontal ) coordinates to move the rectangle in right direction.Similarly we can decrease the x coordinates to move in left direction.
Increase the y coordinates to move in down direction.
Decrease the y coordinates to move in UP direction.
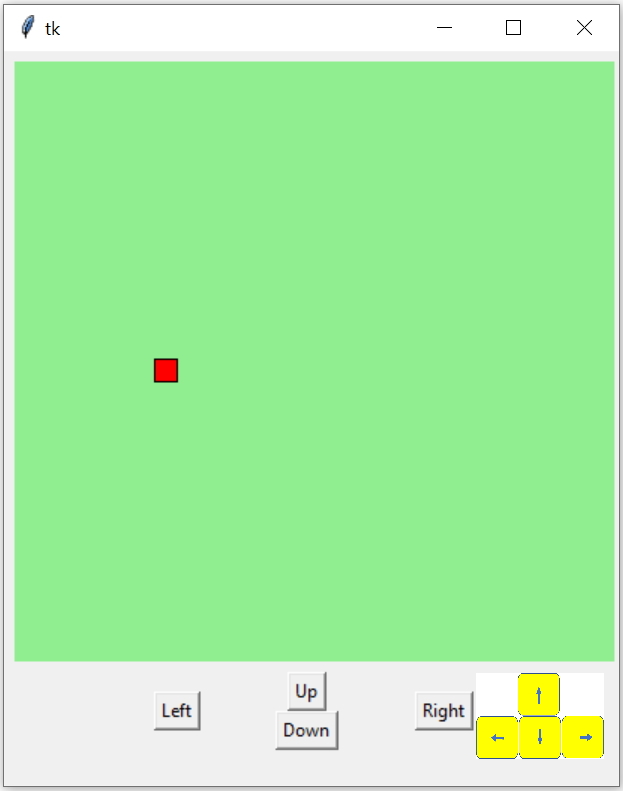
We will use four function to move the item in four different directions. We will add four buttons and each button will trigger the function based on the required direction. Inside the function we will control the coordinates to give the direction of movement to the element.
import tkinter as tk
my_w = tk.Tk()
width,height=610,410 # set the variables
c_width,c_height=width-10,height-65 # canvas width height
d=str(width)+"x"+str(height)
my_w.geometry(d)
c1 = tk.Canvas(my_w, width=c_width, height=c_height,bg='lightgreen')
c1.grid(row=0,column=0,padx=5,pady=5,columnspan=3)
step=10 # Jump in each movement, change this value
x1,y1,x2,y2=5,200,20,215  # initial locations of rectangle
r1=c1.create_rectangle(x1, y1, x2,y2,fill='red')
def right(event):
    global x1,y1,x2,y2,r1
    if (x2<(c_width-step)):  # check right edge
        x1=x1+step # increase the horizontal coordinates
        x2=x2+step
        c1.delete(r1) # delete the rectangle         r1=c1.create_rectangle(x1, y1,x2,y2,fill='red')def left(event):        global x1,y1,x2,y2,r1    if(x1 > step): # check left edge         x1=x1-step # decrease the horizontal coordiantes        x2=x2-step        c1.delete(r1) # delete the rectangle             r1=c1.create_rectangle(x1, y1,x2,y2,fill='red')        def up(event):        global x1,y1,x2,y2,r1    if(y1 > step): # check top edge         y1=y1-step # decrease the vertical coordinates        y2=y2-step            c1.delete(r1) # delete the rectangle             r1=c1.create_rectangle(x1, y1,x2,y2,fill='red')   def down(event):        global x1,y1,x2,y2,r1    if(y2 < c_height-step): # check bottom edge         y1=y1+step # increase the vertical coordinates        y2=y2+step        c1.delete(r1) # delete the rectangle             r1=c1.create_rectangle(x1, y1,x2,y2,fill='red')            b1=tk.Button(my_w,text='Left',command=lambda:left('x'))b1.grid(row=1,column=0,rowspan=2,sticky='E')b2=tk.Button(my_w,text='Up',command=lambda:up('x'))b2.grid(row=1,column=1)b3=tk.Button(my_w,text='Right',command=lambda:right('x'))b3.grid(row=1,column=2,rowspan=2,sticky='W')b4=tk.Button(my_w,text='Down',command=lambda:down('x'))b4.grid(row=2,column=1)
my_w.mainloop()
Using Arrow Keys
We can connect the movement of the item to four directional arrow keys of our keyboard. The button and the arrow key press both can work so we will modify the function to receive the event like this.def down(event): # function declaration
#change the button click event.
b4=tk.Button(my_w,text='Down',command=lambda:down('x'))We have to bind the four arrow keys like this.
my_w.bind('<Right>',right) # binding to right arrow key
my_w.bind('<Left>',left)   # left arrow key pressed
my_w.bind('<Up>',up)       # up arrow key
my_w.bind('<Down>',down) # down arrow key import tkinter as tkmy_w = tk.Tk()width,height=610,410 # set the variables c_width,c_height=width-10,height-65 # canvas width heightd=str(width)+"x"+str(height)my_w.geometry(d)
c1 = tk.Canvas(my_w, width=c_width, height=c_height,bg='lightgreen')c1.grid(row=0,column=0,padx=5,pady=5,columnspan=3)step=10 # Jump in each movement, change this value x1,y1,x2,y2=5,200,20,215 # initial locations of rectangle r1=c1.create_rectangle(x1, y1, x2,y2,fill='red')
def right(event): global x1,y1,x2,y2,r1 if (x2<(c_width-step)): # check right edge x1=x1+step # increase the horizontal coordinates x2=x2+step c1.delete(r1) # delete the rectangle r1=c1.create_rectangle(x1, y1,x2,y2,fill='red')def left(event): global x1,y1,x2,y2,r1 if(x1 > step): # check left edge x1=x1-step # decrease the horizontal coordiantes x2=x2-step c1.delete(r1) # delete the rectangle r1=c1.create_rectangle(x1, y1,x2,y2,fill='red') def up(event): global x1,y1,x2,y2,r1 if(y1 > step): # check top edge y1=y1-step # decrease the vertical coordinates y2=y2-step c1.delete(r1) # delete the rectangle r1=c1.create_rectangle(x1, y1,x2,y2,fill='red') def down(event): global x1,y1,x2,y2,r1 if(y2 < c_height-step): # check bottom edge y1=y1+step # increase the vertical coordinates y2=y2+step c1.delete(r1) # delete the rectangle r1=c1.create_rectangle(x1, y1,x2,y2,fill='red') b1=tk.Button(my_w,text='Left',command=lambda:left('x'))b1.grid(row=1,column=0,rowspan=2,sticky='E')b2=tk.Button(my_w,text='Up',command=lambda:up('x'))b2.grid(row=1,column=1)b3=tk.Button(my_w,text='Right',command=lambda:right('x'))b3.grid(row=1,column=2,rowspan=2,sticky='W')b4=tk.Button(my_w,text='Down',command=lambda:down('x'))b4.grid(row=2,column=1)
my_w.bind('<Right>',right)my_w.bind('<Left>',left)my_w.bind('<Up>',up)my_w.bind('<Down>',down)
my_w.mainloop()Moving automatically in all directions
Instead of triggering the functions ( in different directions ) left(), right(), up() , down() by using buttons or arrow keys , we can use timer to trigger the functions. After reaching the edge in any direction we can call another direction function to move the item in other direction.We are checking the edges by using one if condition, so once the edge is reached by using the else part we can call different function to change the direction.
import tkinter as tkmy_w = tk.Tk()
width,height=610,410 # set the variables c_width,c_height=width-10,height-65 # canvas width heightd=str(width)+"x"+str(height)my_w.geometry(d)
c1 = tk.Canvas(my_w, width=c_width, height=c_height,bg='lightgreen')c1.grid(row=0,column=0,padx=5,pady=5,columnspan=3)step=10 # jump value speed=100 # delay in milli seconds , decrease the value to increase speedx1,y1=5,200x2,y2=x1+15,y1+15
r1=c1.create_rectangle(x1,y1,x2,y2,fill='red')
def right():         global x1,y1,x2,y2,r1    if (x2<(c_width-step)): # check the right edge        c1.delete(r1) # delete the rectangle         x1,x2=x1+step,x2+step # increase the horizontal coordinates                r1=c1.create_rectangle(x1, y1,x2,y2,fill='red')        c1.after(speed,right)    else:        down()def left():    global x1,y1,x2,y2,r1    if(x1>step): # check left edge         c1.delete(r1)        x1,x2=x1-step,x2-step        r1=c1.create_rectangle(x1,y1,x2,y2,fill='red')        c1.after(speed,left)    else: # edge is reached so change direction         up()  def up():    global x1,y1,x2,y2,r1    if(y1>step): # check top edge         c1.delete(r1)        y1,y2=y1-step,y2-step        r1=c1.create_rectangle(x1,y1,x2,y2,fill='red')        c1.after(speed,up)            else: # edge is reached so change direction         right()def down():    global x1,y1,x2,y2,r1    if(y2 < (c_height-step)): # check bottom edge                c1.delete(r1)        y1,y2=y1+step,y2+step        r1=c1.create_rectangle(x1,y1,x2,y2,fill='red')        c1.after(speed,down)    else: # edge is reached so move left         left()
b1=tk.Button(my_w,text='Left',command=lambda:left())b1.grid(row=1,column=0,rowspan=2,sticky='E')b2=tk.Button(my_w,text='Up',command=lambda:up())b2.grid(row=1,column=1)b3=tk.Button(my_w,text='Right',command=lambda:right())b3.grid(row=1,column=2,rowspan=2,sticky='W')b4=tk.Button(my_w,text='Down',command=lambda:down())b4.grid(row=2,column=1)
my_w.mainloop()Sin & cos curves in Canvas
⚡ Master Tkinter Drag and Drop

Subhendu Mohapatra
Author
🎥 Join me live on YouTubePassionate about coding and teaching, I publish practical tutorials on PHP, Python, JavaScript, SQL, and web development. My goal is to make learning simple, engaging, and project‑oriented with real examples and source code.
Subscribe to our YouTube Channel here
This article is written by plus2net.com team.
https://www.plus2net.com

 Python Video Tutorials